Still busy working on my Thimbleberries Pumpkin House (have the fences all assembled) so now it's time for the applique. I've been preparing the berries and leaves and I thought I'd give a little tutorial on how to applique using fusible interfacing. I saw Eleanor Burns demonstrate this method on a Simply Quilts episode and I've been using it ever since.

You'll need fusible interfacing, of course. I prefer a medium weight because it will need to withstand some poking. (A lightweight one I bought would shred at the slightest tug - so test out a small corner before you buy.) I am using a charcoal color interfacing because my background piece is black. Here's a photo of the fusible side:

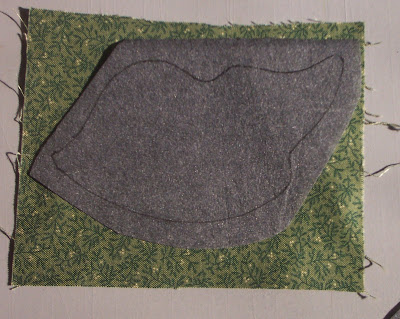
And a photo of the non-fusible side (with the applique shape traced onto it). The interfacing is very thin and I was able to trace the leaf without a lightbox or holding it up to a window.

Next, put the applique fabric together with the interfacing, so that the fusible dots touch the right side of the fabric. Sew on the traced line using a tight stitch (like 1.5) and a thread that matches either the applique fabric or the interfacing. In this case, I used black.

Once it's sewn, trim the seam allowances using pinking shears. This works out really well - and saves you from clipping the curves of the piece. After it's been trimmed, make a few cuts in the center of the interfacing as shown. Be careful NOT to cut the applique fabric!

Finally it's time to turn the right side of the fabric through that cut in the interfacing. You may need to pull at it a bit. I use my Purple Thang to round out my curves and to make my points sharp, but Eleanor uses a bodkin. Either way, fuss with it a bit until you get it nice and smooth - like my leaf below:

Then, position the shape on the background fabric and, following the manufacturer's instructions for the interfacing, press in place. Here's a photo of another piece where I used this same method. The stitches are all done by hand using perle cotton. See how the applique puffs up a bit? That seems to help the stitches lay nicely around the outer edge.

Try it out sometime - you may like it!
*** A special thank you goes out to Peggy for sending me her leftover green fabric for my vines. You're a lifesaver! I'm wondering if my bias strips ever made it out of that garbage bag in Minnesota! LOL
7 comments:
I like this method for applique also. Though, I've never attempted anything with so many little curves or points! :) Looks great! :)
OH THANK YOU! I needed this! I was taught this method about 3 years ago, but this is much better..You make it look much easier to do! *~*CAROLE*~*
I have not tried this...I absolutely have to try it!! It really looks great, finished.
Nice job on the tutorial....
You're welcome on the fabric....
I have a vacation day today so I'm working on my fences :) You know I'll blog when I'm done.
Peggy
Wow ! Would never have thought about using Pinking Shears (for edge cliping). What a great idea.
Great tip thank you
Thank you, I really just needed to see this. Just like this.
Just what I've been looking for - and I love the pinking shears tip, too - thank you x
Post a Comment